
Und hier Lilla mit LGB-wagen.
Viele Grüße
Thomas
Und hier Lilla mit LGB-wagen.
Viele Grüße
Thomas
Hallo Dampfadi,
Hier sieht man Roundhouse Charles, Reppingen EKB und LGB-wagen zusammen:
https://www.schienendampf.com/forum/thread/2291-grüße-aus-norwegen/?postID=32777#post32777
Grüß
Thomas
Hei Michael,
Takk for hilsen på norsk. ![]()
Vi får vel holde oss til tysk og litt engelsk her.
Forøvrig alltid moro å besøke andre baner, men også moro på balkongen.
Viele Grüße,
Thomas
Hallo Andreas x2,
Thanks for your kind words.
It is all about getting down to get the right perspective
and to avoid everything out of scale.
This railway is raised about 1 m, so "getting down" is easy.
Regards,
Thomas
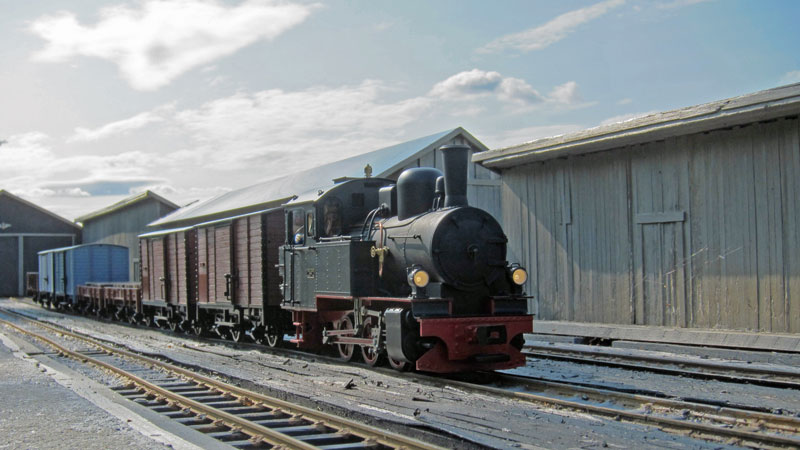
And I have had the pleasure to test the loco at a larger railway.
Focused on running so didn't take many photos, but this turned out well:
Gruß,
Thomas
Hallo,
A few things more to mention...
The gas filler adapter from Reppingen was filled with brass dust and chippings.
I didn't discover it before I attached it to the filler valve, thus the valve
and tank was filled with brass dust.
I scrapped that valve anyway and instead replaced the small valve
with a self venting Ronson valve as used by Accucraft.
It has the same M5 x 0,5 threads.
(Note that the Roundhouse gas valve is M4,5 x 0,5.)
I can then use the same type of gas filler adapter as I use on my other locos.
Reppingen valve right. Accucraft valve left.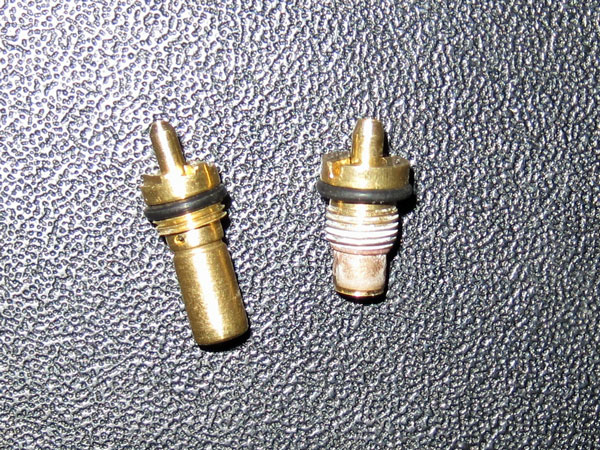
To be able to close the lid on the left water tank I chopped off the bush on the gas tank.
There is still more than enough of the threads left to fit the valve.
Best regards,
Thomas
Hello EKB-fans,
Then my railway has got a new loco in working condition.
After a long and sometimes frustrating building process
the end result seems to turn out very well.

After adding the cab I got some nasty sounds while driving.
It was caused by the brackets on the water tanks being too deep and
getting in conflict with the bolt heads on the expansion links on both sides.
Some more milling and filing fixed it.
The switch from CTI-Modellbau works very well.
Gruß,
Thomas
Ich habe das gleiche Problem und verwende Loctite Schraubensicherungslack als Kleber zwischen Lampe und Fußplatte, nicht nur an die Schrauben.
Gruß
Thomas
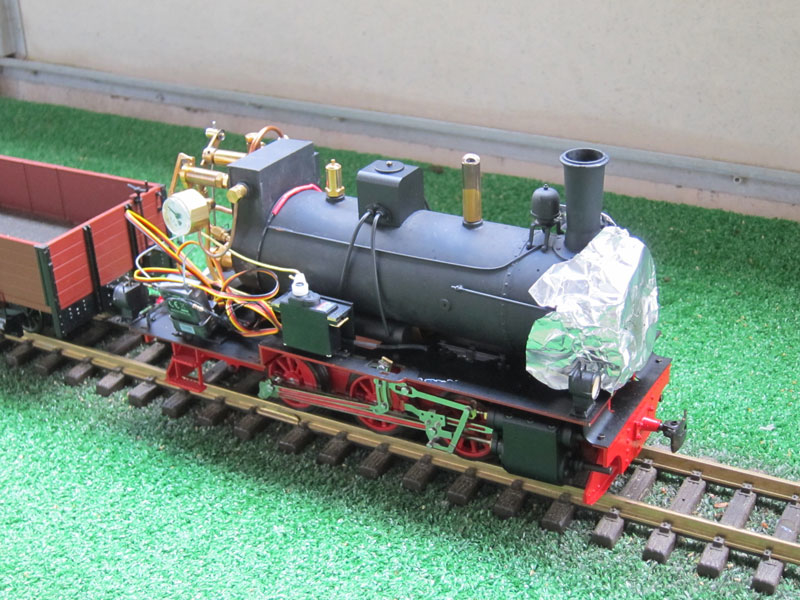
A few updates...
The steam regulator was shipped to Reppingen for a fix
and now works very well.
The safety valve was a lot easier to adjust when hot.
I have doubled the size of the hole in the footplate for
the whistle steam.
The servo used for lights turned out to be too cheap.
After a while it got very hot and the lights got dim.
Instead of using a more expensive servo,
I will try the Lokbeleuchtung mit RC schalten. and
have ordered a switch from CTI-Modellbau.
A photo from a new test at the balcony:
Gruß,
Thomas
 Zitat von Thomas
Wie weit ist den Grävesberg weg von Gävle?
Die TGOJ M73 würde mich für Details schon sehr interessieren.
Hallo Thomas,
Grävesberg? Ich denke du Grängesberg meinst? :GR
Ich kenne der Ort nicht, so dann muß ich Google Maps benutze. :wink:
Bitte schreiben mir ein pm in Englisch,
und ich kann vielleicht weiter helfen.
Gruß
Thomas
 Zitat von rebelego
Die 100 Jahre Schwedisches Eisenbahnmuseum ist am 23. Mai mit einer große Dampfgala.
Eine tolle Veranstaltung! :flt:
https://www.youtube.com/watch?v=tKHu5sBTAfA
(nicht mein Video)
Grüß
Thomas
Beachten, es sind zwei Jubiläen.
Die 100 Jahre Schwedisches Eisenbahnmuseum ist am 23. Mai mit einer große Dampfgala.
Die 100 Jahre Bahnelektrifizierung ist am 12. und 13. September mit dem Krokodil.
Dampfgrüße
Thomas
![]()
I have done the first few test steam-ups and have some issues.
The steam valve doesn't close properly.
It leaks steam when supposed to be shut.
I have verified this by detaching the steam pipe from the valve.
I have contacted Reppingen, but not got any reply.
According to Reppingen the safety valve should open at 4 bar
and close 1 bar below, ie at 3 bar.
My safety valve opens at 5 bar and close at 3,4 bar.
How can it be adjusted? Is it like the Roundhouse valve?
I have tried to use a plier in the holes on top, but it seems stuck.
Else, it seems like this is a very powerful and easy rolling engine.
It will probably require a heavy load to pull.
Though, it ran quite well at only 0,3 bar on air, but I'm not happy
with the timing on steam, so I think I must do a second round of fine tuning.
Gruß,
Thomas
Hallo Turbinenbauer,
Echtdampfturbinenlokomotive mit Fahrgestell aus LEGO. :flt:
[youtube]
Gruß
Thomas
Hi Zoltan,
How to convert a servo to switch on and off LED's:
http://www.instructables.com/id/Convert-a-S…-LEDs/?ALLSTEPS
You may want to keep the potentiometer and use it to adjust the center point.
My first intention was to attach the servo with a Y-cable to the same channel as the direction control,
but as I decided to use the 3-way switch instead, I just replaced the 5k potentiometer with two 2k5 resistors.
Regards,
Thomas
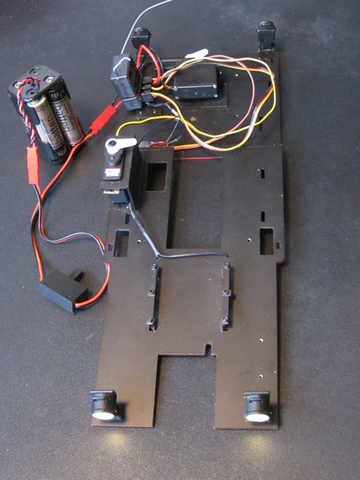
Hi EKB-fans,
Very slow progress, and I only have my self to blame. :pff:
I have now mounted the lamps and done the wiring.
I think it is a good idea to do it before mounting the footplate to the frame.
The lights are controlled by a small and inexpensive servo which is
controlled by a tree-way switch on the RC transmitter.
The servo motor is removed and the potentiometer is replaced by two resistors.
By using the trim for the center point I get 'on forward' - off - 'on backward' on the switch.
Fröhliche Ostern,
Thomas
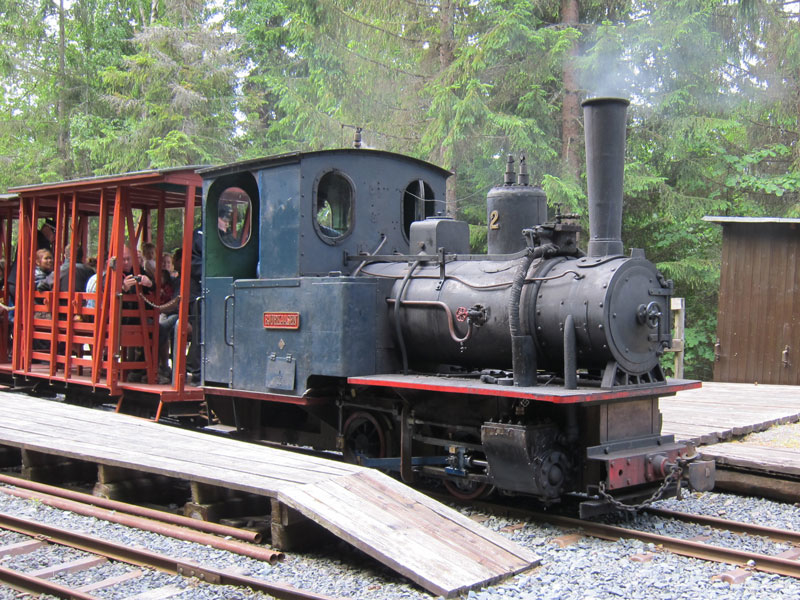
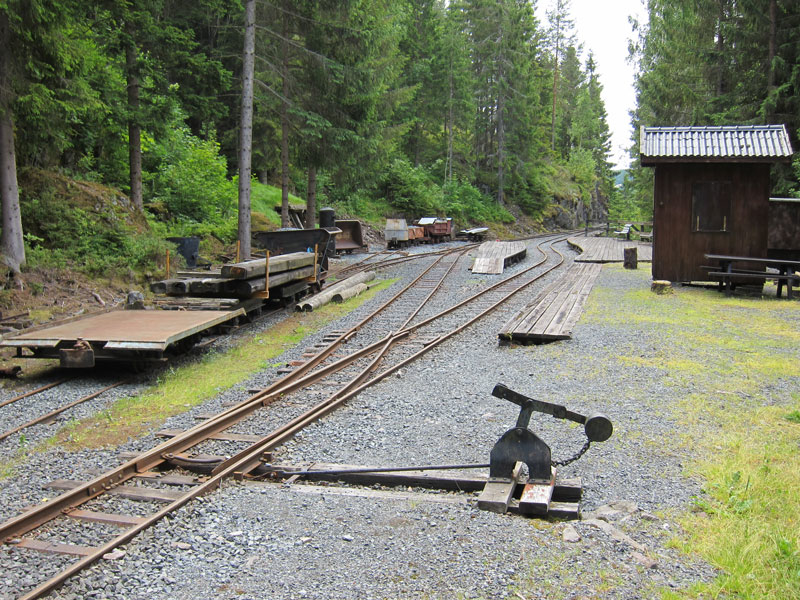
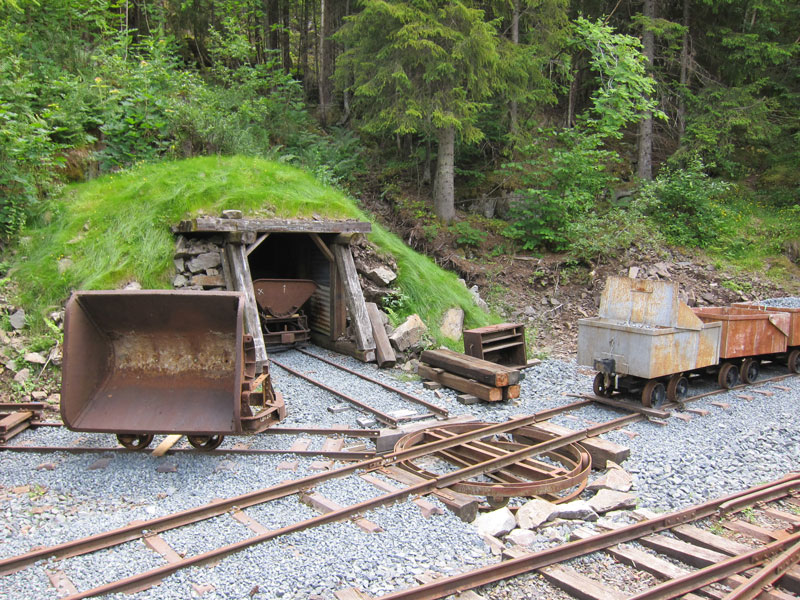
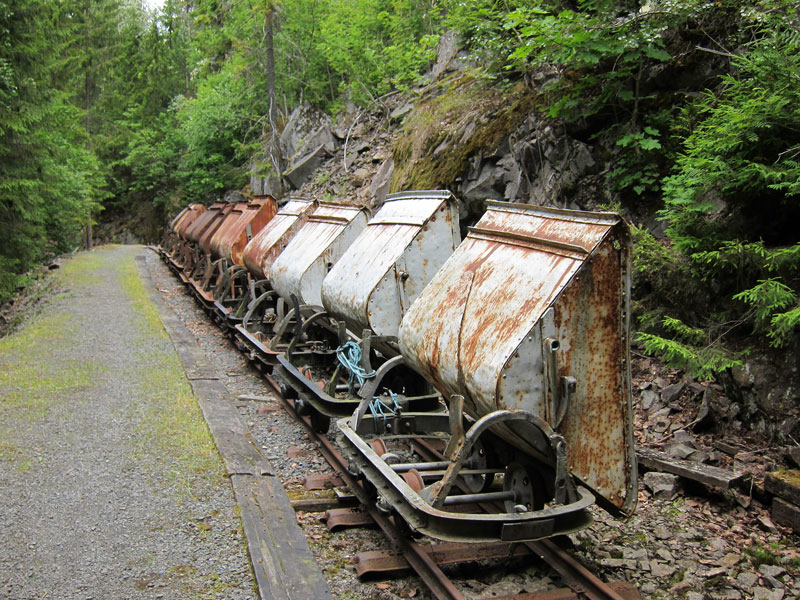
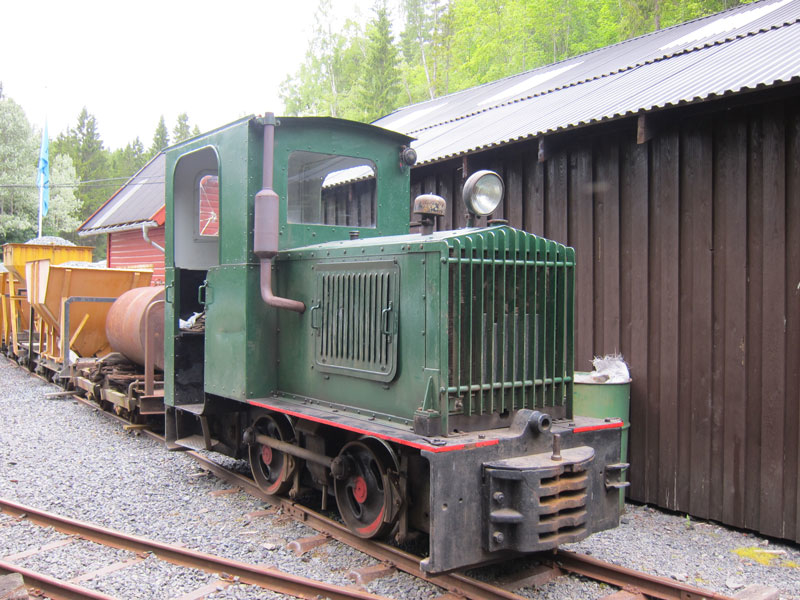
Lommedalsbanen ist ein kleines Industrie- und Feldbahnmuseum in der nähe von Oslo.
600 mm Schmalspur mit Dampf oder Diesel in betrieb Sonntagen im Juni, August, September und Dezember.
http://www.lommedalsbanen.no/ (nur Norwegisch)
Einige meiner eigenen Bilder...
Grüß,
Thomas
Hello again,
Thanks for the info. I found myself sounding a bit grumpy here, but it is not really the case. More a matter of frustration. :roll:
Anyway, I have got an e-mail from Ralph Reppingen saying he is getting help translating the user manual into English. :TOP Though, I don't know whether this indicates that there exist a user manual in German. (?)
Note that my criticism of the building instructions is not related to language issues. In case any other read this and wonder... the building instructions are only available in German. I have had no problems with that. I have also got the building instructions as a PDF file which makes it easy to copy and paste into Google translate if needed. Though, Google sometimes makes some funny and weird translations.
For "Deutsch - Norwegisches Wörterbuch" I can recommend Heinzelnisse.
Regards,
Thomas
Hi Zoltan,
Thanks for your info. Nice to know what to expect from Regner.
I try to follow your Vulkan-thread. :TOP
Kind regards,
Thomas
Hi all,
Thanks for your answers. As I said, disappointments are all about expectations, and mine where certainly wrong. Sounds like this is what to expect from a Regner kit as well?
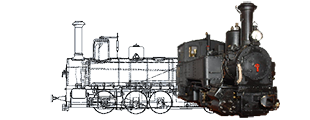
Yes, the Brits seem to be a bit paranoid regarding boiler testing and certificates. Then I assume that non of the German vendors like Regner, Herrmann and Reppingen deliver their locos with such. (?) The reason for asking was this image on the Reppingen website showing an EKB with what seems to be a serial number on the boiler.
[Blockierte Grafik: http://www.reppingen.de/images/Lokomotiven/EKB19c/EKB19c_02_gr.jpg]
I think I manage very well without a user manual. I just expected there to be one. I'm only looking for specific info about the EKB. Things like the working pressure can vary between models and vendors. As Reppingen also sells RTR locos it is strange not to provide any user manual. Though, I find it even more strange (and a bit annoying) that Reppingen does not answer my questions about it. Investing some time in documentation will usually pay off in less support, but of cause it is a trade-off. Though, I guess Reppingen would save both time and extra shipping costs by at least making a check list for him self. :wink:
In January I started on a Roundhouse chassis with Riverdale boiler, and it is a totally different world. Nice and detailed building instructions and complete check list for all parts. The Roundhouse building instructions can be downloaded from their website and can actually be useful reading when building any live steam loco.
Kind regards,
Thomas